There is nothing better for web development that having your own local web server to test your web pages on before uploading them to a live server. As a Linux user, I have many choices including Apache2 and Lighttpd. I chose to use the latter of the two, because it is more lightweight and I do not need any of the fancy features offered by Apache2. Of course, a good web server is not the only application a web developer needs. a MySQL database and PHP5 support are almost always required. This whole setup is usually referred to as LLMP (Linux, Lighttpd, MySQL, PHP) and there is already an excellent tutorial that guides one through installation on Ubuntu. However it includes too much detail, and many people (including me) that already know what they need, and just want to know the commands to install everything. So I decided to compress the tutorial into one short blog post.
Execute the following commands as root (access can be gained through sudo /bin/bash)
aptitude install lighttpd mysql-client mysql-server php5-mysql php5-cgi phpmyadmin

lighty-enable-mod fastcgi userdir

/etc/init.d/lighttpd start

/etc/init.d/mysql start
That is it, you now have a fully functional web development environment (well, not including the editor) right on your Ubuntu installation. You can access your webpage through http://localhost orhttp://localhost/~user for contents of user‘s public_html file. Also phpMyAdmin, a great web based manger for MySQL databases is accessible through http://localhost/phpmyadmin
Another useful thing is to enable access to your web server only from your own computer. To do this, open the /etc/lighttpd/lighttpd.conf file using the following command:
sudo gedit /etc/lighttpd/lighttpd.conf
And uncomment the line that says:
server.bind = "localhost"
You uncomment the line by removing the # symbol that is at the beginning of it. After you are done, the line should look like above. Make sure to restart the lighttpd server for the changes to take effect using the following command:
/etc/init.d/lighttpd restart
Setting up a LLMP Stack (Linux, Lighttpd, MySQL, PHP5) on Ubuntu 8.10
I have wanted to switch from Apache to Lighttpd for my web server for quite a while. In this article I am going to go over my installation of Lighttpd, MySQL with phpmyadmin, and PHP5 on Ubuntu 8.10. In a future article I will go over setting up my sites to run on Lighttpd. I am running a 256mb ‘slice’ from Slicehost. For the basic setup of my slice I followed Slicehost’s Ubuntu Intrepid Setup Tutorial.
1. Install Lighttpd
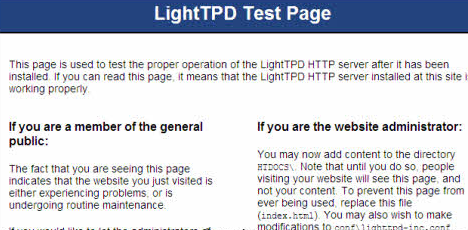
After you installed Lighttpd open up your web browser and point it to your IP address. You should see the Lighttpd placeholder page.
2. Install MySQL & phpmyadmin
During the MySQL you will be asked to set your MySQL root password. You may also be asked during the phpmyadmin install what web server you want phpmyadmin to use. Select Lighttpd.
3. Install PHP5 with MySQL Support
4. Setting up Lighttpd & PHP
PHP is not enabled by default in Lighttpd, so we need to set that up now. We are going to edit the php.ini file.
and add the following line to the end of the file:
Now we need to enable the fastcgi module in Lighttpd. While we are here we are going to enable Lighttpd’s mod_rewrite since we are going to use that later.
Look for the line “server.modules”. Remove the “#” from the line “mod_rewrite”, and on a new line add “mod_fastcgi”,. It should look something like this:
server.modules              = (
            "mod_access",
            "mod_alias",
            "mod_accesslog",
            "mod_compress",
            "mod_fastcgi",
            "mod_rewrite",
#           "mod_redirect",
#           "mod_evhost",
#           "mod_usertrack",
#           "mod_rrdtool",
#           "mod_webdav",
#           "mod_expire",
#           "mod_flv_streaming",
#           "mod_evasive"
)
Before closing the file we need to add one more thing to it. At the end of the file add the following:
fastcgi.server = ( ".php" => ((
                     "bin-path" => "/usr/bin/php5-cgi",
                     "socket" => "/tmp/php.socket",
                     "max-procs" => 1,
                      "bin-environment" => (
                      "PHP_FCGI_CHILDREN" => "4",
                      "PHP_FCGI_MAX_REQUESTS" => "1000"
                     ),
                 )))
Adding this to the lighttpd.conf file does two things. The first is it tells Lighttpd how to handle the PHP requests, and the second is it controls how many FastCGI processes are running to handle the PHP requests. We now need to restart Lighttpd for these settings to take effect.
5. Testing everything out
Now lets test your setup and make sure that it worked.
Create a file, info.php so that we can test our install and make sure that everything works.
Add the following lines of code:
phpinfo();
?>
Now pull up our new page: http://192.168.1.101/info.php in your browser. You should see that you are running PHP5 using FastCGI by looking at the “Server API” line. If you scroll down you will also see that MySQL is supported.
That is it.. Your LLMP install is now complete! Stay tuned for more articles on how to setup your websites using Lighttpd as your web server. Because MySQL does not come optimized, please follow the MySQL part of the tutorial on Configuring a lightweight Apache / MySQL install on Debian/Ubuntu.

